Updating the Firmware – Anycubic Mono X Resin Printer
Every machine runs off of firmware, and the Anycubic Mono X is no different. While in most case, updating the firmware isn’t necessary, it can sometimes address certain issues that come stock with the machine. In this article, we’re going to go through the process for this particular machine. As always, there’s a certain element of risk involved when doing, so I’m in no way responsible if any damages may occur.
Updating the firmware is important for a couple of main reasons. If you’re upgrading the free license of Chitubox from an earlier 1.8.1 version, then this update will make it compatible with the software. These updates also help address some common bugs and on other machines that can sometimes included additional functionality.
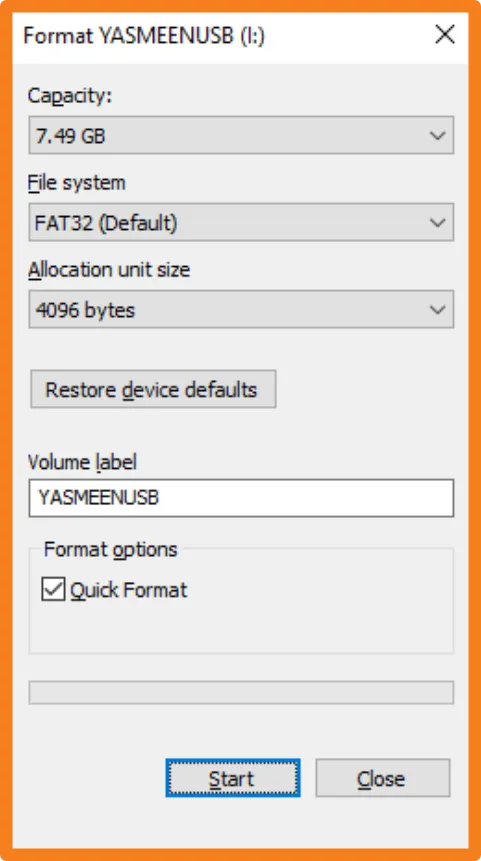
Before updating anything, you’ll first need to reformat a USB stick to make sure there’s nothing can can interfere or cause issues. In windows, you’ll right-click this drive and select the format option. In this case, we can simply use the Quick Format while making sure it’s set to FAT32. Once completed, we can then begin downloading the files.
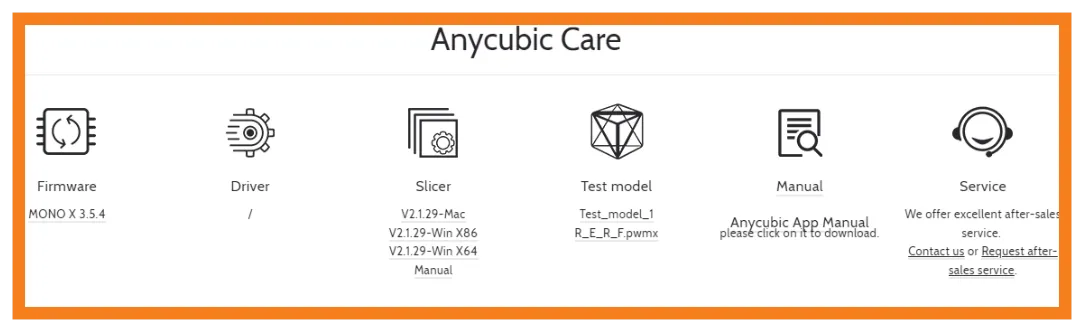
Currently, there are two versions of the firmware for this particular machine, and they currently come bundled together when you download them from the main website. Luckily, Anycubic realized this could cause issues and made it so that only the correct version would install, so long as the proper order is followed. Going to the main website, you’ll download these by going to, 3D Printers + Photon Series + Mono X. You’ll then scroll all the way down until you reach the firmware section where you’ll be able to download the package. Be very careful about installing these files in the correct order.
Once you’ve unzipped the files, you’ll notice 4 files within the folder. There’s the ReadyMe document along with the 3 firmware files. You’ll transfer the .bin files to the root director of the USB stick and plug it into the Machine. In order to run these updates, we need to print them. So we’ll first Print the P_MXV5_4_0812(1).bin file. It’s important to start the update process with this file, otherwise you may run into issues. After confirming that you want to update, the process will begin and the machine will be restarted. This can take a couple of minutes, so be patient. With the first part is completed, you can then run the remaining two updates. Only one of these two files will work, the with one will be showing an error. With the update completed, you’ll remove the USB stick and restart the machine to make sure that everything has been enabled. I personally didn’t need to change any of my settings after doing this update, however your millage may wary.
Unlike many of the original machines, this one lacks a protective glass layer to protect it from spills and damages. To keep your machine in good working order, you can view this article here for information on how to protect your machine’s screen. Protect your LCD Screen
Yasmeen completed both the 2D and 3D animation course at Algonquin College and worked in the animation industry as a freelancer for a number of years before being hired to manage the 3D printing services at ItsYeBoi. While using the Alias of "Jenny" during her services, she was responsible for the testing, maintenance and upgrading of the machine while also filming and developing 3D printable assets for various projects.