Yasmeen completed both the 2D and 3D animation course at Algonquin College and worked in the animation industry as a freelancer for a number of years before being hired to manage the 3D printing services at ItsYeBoi. While using the Alias of "Jenny" during her services, she was responsible for the testing, maintenance and upgrading of the machine while also filming and developing 3D printable assets for various projects.
Hi everyone, and welcome back to my channel. In this video, I’m going to share my approach to combining textures in both Blender and Unreal Engine. I took an online course on these software to speed up my learning process, and I found it helpful to explore how the concepts from one platform could be applied in the other.
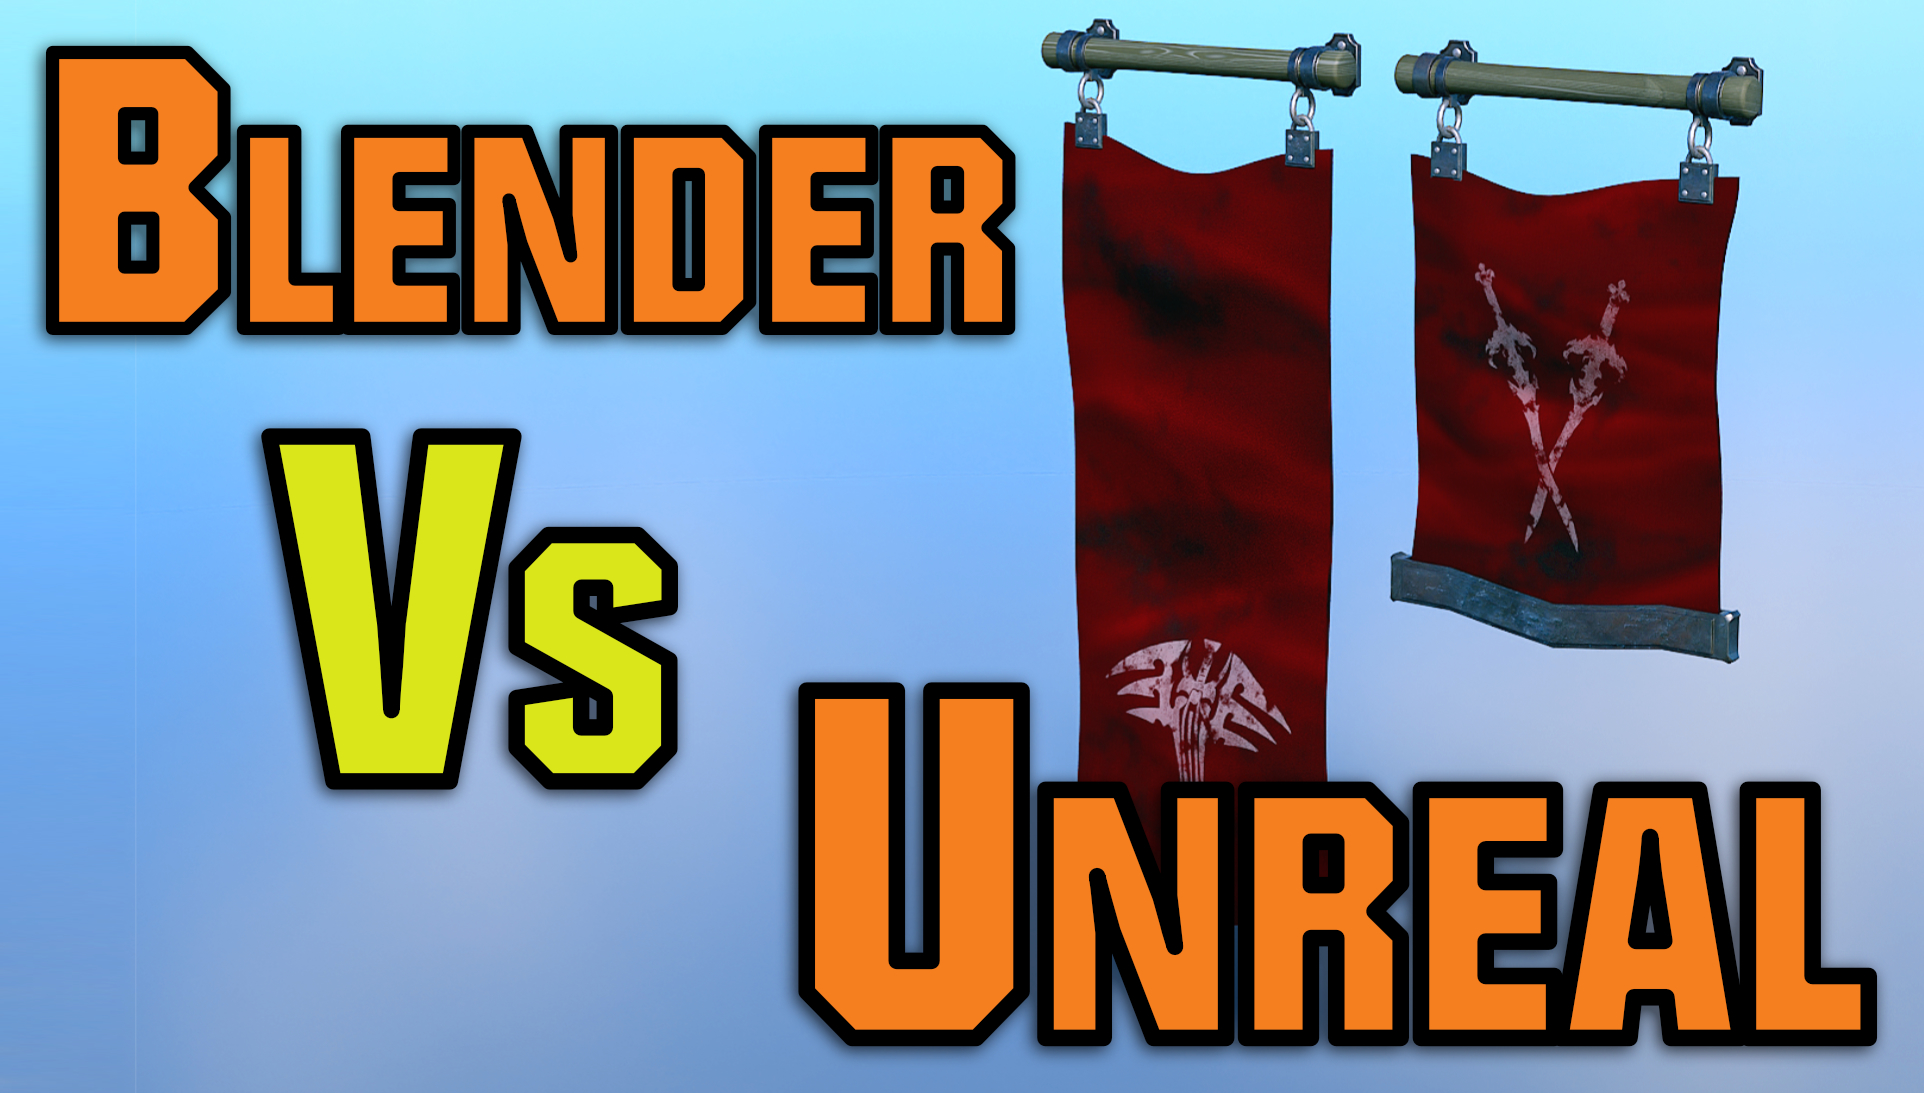
The Flag Experiment:
For this experiment, I duplicated a cloth material in Blender and added textures to create a flag. In Unreal Engine, I followed a similar process but used different node configurations for texture mapping and blending.
Blender Technique:
Used texture coordinate and mapping nodes to define the texture placement.
Employed color adjustment nodes to fine-tune the colors.
Combined textures using the color mix node with various blending modes.
Unreal Engine Technique:
Created a master material with scrolling textures for a preview.
Used a mask node to selectively apply textures based on UV coordinates.
Implemented an LERP node to blend between textures based on a value.
Adjusted UV map scaling and texture placement to achieve desired folds.
Results:
Both Blender and Unreal Engine produced similar results, demonstrating the versatility of combining textures in different software. I found that understanding the underlying concepts from one platform helped me navigate the other more efficiently.
Conclusion:
Combining textures is a powerful technique for creating visually appealing assets in game engines. By exploring cross-platform knowledge, developers can leverage the strengths of each software to achieve their artistic goals.
Key Takeaways:
Understanding texture mapping and blending techniques in both Blender and Unreal Engine is crucial for combining textures effectively.
Cross-platform knowledge transfer can enhance creativity and efficiency in game development.
Experimentation and exploration are key to unlocking new possibilities in game creation.
SWAPPING THE LIVE-CENTER FOR A CHUCK: A CRUCIAL MODIFICATION
As a machinist or hobbyist, you may find yourself needing to drill holes with precision and accuracy. In this article, we’ll explore the process of swapping out the live-center for a chuck on your lathe, and discuss some crucial considerations to keep in mind.
FROM LIVE-CENTER TO CHUCK: THE PROCESS
If you want to drill holes that are perfectly centered, consider swapping out the live-center with a chuck. This modification can be incredibly useful for precision work, such as drilling small parts or creating detailed components.
However, it’s essential to note that the process of removing and installing a new chuck can be challenging, especially if this is your first time doing so. To make things easier, we recommend placing a rag over the live-center and using vice grips to loosen it. This will help prevent any accidental slipping or damage to surrounding parts.
THE IMPORTANCE OF CHOOSE THE RIGHT CHUCK
Once you’ve loosened the live-center, it should be relatively easy to remove and replace with a chuck. However, keep in mind that not all chucks are created equal! For this particular model of machine (the ZHRUI metal miniature lathe 36W 20000rpm), you’ll need to choose a chuck that meets specific requirements.
In particular, the chosen chuck should have an M12 thread size and a main body dimension of 48mm. This ensures compatibility with your machine’s specifications and guarantees accurate hole placement.
DEEP HOLES: A WORD OF CAUTION
While swapping out the live-center for a chuck can be incredibly useful, it’s essential to exercise caution when making deep holes. The further you extend the Live-center, the more prone it is to chatter – which can significantly affect your final product’s quality and accuracy.
To avoid this issue altogether, take careful consideration before embarking on deep hole drilling projects. It may be worth investing in a chuck with built-in features that help minimize chatter or using specialized tools designed for precision work.
THE MACHINE USED IN THIS TUTORIAL
For those interested in attempting these modifications, it’s crucial to note that the machine used in this tutorial is specifically the ZHRUI metal miniature lathe 36W 20000rpm. This model was advertised on Amazon and can be found online.
To ensure compatibility with your own machine (if you plan to modify yours), we recommend sourcing a chuck with an M12 thread size and main body dimension of 48mm – just like the one used in this tutorial.
When it comes to 3D printing, choosing the right materials can make all the difference in ensuring a safe and successful print. In this article, we’ll discuss the material requirements for three critical components: the Thread Cover, Side Cover, and Back Plate Cover.
TPU or Equivalent Flexible Material is Necessary
All three components require TPU (Thermoplastic Polyurethane) or an equivalent flexible material to be printed with. This is essential for safety reasons, as it allows the parts to flex and absorb any impact or movement without breaking off. In particular, this flexibility is crucial in catching debris and preventing damage to the surrounding machinery.
Printing Specifications
The following printing settings have been used in the examples within this document:
Layer Height: 0.2 mm
Infill Density: Minimum 15%
Wall Lines: Minimum 3
These specifications are critical for ensuring a strong and reliable print that can withstand regular use.
Thread Cover Requirements
The Thread Cover is an essential component that must be printed with TPU or equivalent flexible material to ensure its intended safety feature. The printing specifications remain the same as above:
Layer Height: 0.2 mm
Infill Density: Minimum 15%
Wall Lines: Minimum 3
When installing the Thread Cover, it’s essential to note that it fits snugly around the cross slider by stretching into place. Two inset components help secure the cover in position, ensuring a stable fit.
Side Cover Requirements
The Side Cover is another critical component that must be printed with TPU or equivalent flexible material. The printing specifications remain the same as above:
Layer Height: 0.2 mm
Infill Density: Minimum 15%
Wall Lines: Minimum 3
When installing the Side Cover, ensure that you have assembled it in the correct orientation with the Thread Cover in place. This will allow for easy verification of proper assembly.
Back Plate Cover Requirements
The Back Plate Cover is designed to attach to and be supported by T-slots within the extrusion. It serves two primary purposes:
Motor Vent Protection: The part shields the motor vent from potential debris or damage.
Stock Material Containment: It also captures any material flying off during the lathing process.
The printing specifications remain the same as above:
Layer Height: 0.2 mm
Infill Density: Minimum 15%
Wall Lines: Minimum 3
Additionally, the Back Plate Cover is designed to be removable for easier maintenance access.
Machine Requirements
For this tutorial, we used a ZHRUI metal miniature lathe (36W, 20000rpm), which was advertised on Amazon. It’s essential to ensure that you have a similar machine in place before attempting these modifications.
By following the material requirements outlined above and using the correct printing specifications, you can ensure that your 3D prints are safe, reliable, and perform optimally.
As a machinist or hobbyist, you may find yourself in need of a lathe with more extensive capabilities. One way to achieve this is by extending the dimensions of your existing lathe. In this tutorial, we will guide you through the process of modifying your lathe to increase its maximum material length.
THE ORIGINAL LAYOUT
The original layout of most lathes is compact and designed for working with shorter materials. However, with a few simple adjustments, it’s possible to expand the capabilities of your machine. The headstock and tailstock are typically connected via parallel connectors and stabilizing plates, which can be loosened to allow movement.
THE IMPORTANCE OF CONNECTION PIECES
Before making any adjustments, it’s essential to understand the connection pieces that hold the headstock and tailstock in place. A concealed connector piece is located behind the drive belt cover on most lathes. This critical component ensures a rigid connection between the headstock and tailstock and the machine bed.
EXTENDING THE HEADSTOCK AND TAILSTOCK
To extend the dimensions of your lathe, loosen the parallel connectors and stabilizing plates that connect the headstock and tailstock to each other and the machine bed. This will allow you to move these components further apart, increasing the maximum material length that can be machined.
ADJUSTMENT SPECIFICATIONS
When making this adjustment, keep in mind that it’s essential to maintain as much support as possible between the headstock and tailstock. Be careful not to overextend them past the machine bed, as this can compromise stability and performance.
With these modifications, you can expect an additional 1 ½ inches to 2 inches of length, making it easier to work with drill bits or other long materials. This adjustment is a simple yet crucial step in unlocking your lathe’s full potential.
SAFETY PRECAUTIONS
Before attempting this modification, ensure that you have a solid understanding of the connection pieces and how they interact with each other. It’s also essential to follow proper safety procedures when working with power tools and mechanical equipment.
By following these steps, you can extend the dimensions of your lathe, increasing its capabilities and versatility. Remember to maintain maximum support between the headstock and tailstock for optimal performance, and don’t hesitate to reach out if you have any questions or concerns about this modification.