SLA Printer – How to properly clean resin prints

How to Properly Clean A Resin Print

    Have you every tried cleaning your resin print only to find that there’s there’s still some residue?  Well, in today’s article, we will address how to clean your 3D prints to get the most out of your machine. Some of these tricks will most likely not be one’s that you’ve might have heard.

    Drainage Holes

    Drainage holes help reduce the amount of pressure buildup when printing a hollowed out model, but can be difficult to clean out.  So long as you’ve properly set up your print, these can still be cleaned easily if you know a couple of tricks.  In this example, I have 2 drainage holes.  This means that while one hole will release air or fluids, the second one will do the reverse, and this becomes more important as we begin cleaning the model.  Before taking the print out of the cleaning liquid, I’ll shake this around a little to dislodge some of the resin prior to draining the model.  I’ll orientate the model so that all the fluid can drain out, but making sure to swirl the fluid around some more.  I do all of this while wearing protective goggles.  To be sure that I’ve removed everything from the inside, I’ll use a fine tipped squeeze bottle to force liquid into one hole and allowing it to drain out of the other.  When you’re using a new batch of cleaning solution, you’ll notice that it will eventually become clear, and this means you’ve removed the excess material.

    Quick tip

    For the really tiny prints, using a tea steeper will allow you to clean these with less risk of losing the small parts.  I would suggest getting one with decently sized holes to ensure that the cleaning fluid can flow more easily within.

    Recommended Tools

    If you made a mistake during the setup and didn’t include enough drainage holes, you can add these later by using a hand drill. This will allow you to force fluid into the area to ensure that it’s completely clean before you begin the curing process.  I use a small prying tool to unclog the hole, but you can easily use a toothpick as well.  When uncured resin stays trapped, it can cause the model to split and crack, therefore it’s worth investing a small amount of time in ensuring that all trapped resin is removed.  I normally have a wide variety of these drill bits handy, since they can often be a lifesaver when working on last minute projects. This is where previewing your model will help keep these issues from arising, since it can show you where a portion of the model can fail. 

    How Many Cleaning Stations

    I highly recommend you have two cleaning containers since this helps prevent any leftover residue.  One container or cleaning station can be used to remove the majority of the resin, while the secondary one will remove the remainder.  You’ll also find that you shouldn’t need to replace the cleaning solution for the secondary material as often as a result.  

    Re-use Some Garbage

    As I scrub my model I often use a rag that I’ve salvaged from an old T-Shirt and I have found it to be the best in removing residual material.  For the tighter regions, I often use the tip of a silicone basting brush because this can easily scrub the tight areas without damaging the surface.  Just make sure to label this so that you don’t accidentally use it for anything else.  

    Softening Supports For Removal

    While some people will use warm water to soften their models, in most cases you don’t actually have to do this.  Instead, simply allowing the model to soak in isopropyl alcohol for about 1 hour will often have a similar effect.  Another method is to use a hair dryer to gently heat the supports, so they become softer as well.  Another benefit of using the hair dryer is that you can quickly tell which area still need cleaning by drying it off and looking for any shiny areas.

    Now that you have a properly cleaned print, you’re probably wondering how to actually remove the supports from your prints.  Well this video I’ll help you do just that, so make sure to watch that one next.

    Personal Notes

    Supplies

    • Protective Goggles
    • Rag
    • Basting Brush (label + only use for this purpose)
    • Fine Tipped Squeeze bottle
    • Prying tool
    • Hand drill + bits
    • 2 Cleaning containers
    • Hair Dryer

    Recommended Articles

    SLA Printer – Starting your First Print – Pt03 3D Printing Basics

    How to do your first resin print
    SLA Printer Full Guide

    Instructions

    Well, in today’s article we’ll be going over what you need to know, so you can start printing as soon as possible.  

    For this video, we’re going to assume that you’ve already levelled your build plate according to your machine’s instructions. And since calibration can take a while, that’ll be covered in a more in depth video later on.  For now, however, we’re going to use the recommended manufacturer settings for the resin that you purchased, since in most cases this will be a good starting point.

    So to start things off we’re going to need an epic file to 3d print and these come in a variety of formats.  The most common of which is the SLT file format that you see here.  This format has remained pretty much unchanged from its initial commercial adoption in 1987. Other common file formats include OBJ and 3MF and are compatible with most slicing software packages.  I like many other creators online, I get these files from a variety of sources or make their own, but the main ones are Thinginverse and GrabCad. In order to take this files and print them, they first need to be compiled into a language that the printer can understand and this is where software like Chitubox, Prusa Slicer, lychee and many more come into play. These pieces of software turn the 3d objects into slices, which can then be printed in steps by the 3d printer of choice. Unlike an FDM printer, LCD printers print one full layer at a time, making it generally more efficient to fill the build plate.

    Before opening up a 3d file, you’ll first want to set up your machine settings and get it calibrated. In Chitubox the free version, you can do this by going to “Settings” + click on the “Add New Printer” button and select from either a preexisting profile or set up your own instead. You’ll then need to set up your print settings for your material. Most resin and 3d printer manufacturers provide some suggested settings which are available online and while these are a good starting point you’ll most likely have to tweak these to get better results.   Each resin, even if it’s from the same manufacturer, will have its own settings and each 3d printer will behave slightly differently, which is why these settings are generally just a starting point. 

    The slicer will allow you to see your model in a virtual representation of your build plate where you will be allowed to manipulate its dimensions, orientation and much more. Once we’ve imported the file, we’ll need to orient it so that it has enough support from the peel forces. These forces are created when the build plate lifts and away from the FEP sheet. A common practice is to hollow out the model to save on resin, and while this does help quite a bit, it also increases the peel forces by create a pocket in which the pressure can build up.  It’s for this reason that we’ll need to do two things with this model before we can start printing. First, we’re going to orient it in such a way as to reduce the amount of forces being applied while also reducing the amount of support that’s needed. While this can normally be a 45-degree angle, this will depend on the size and shape of your model. For example, the custom key caps that I make have very little peel force being applied, and I can actually print them almost entirely flat. My “Peel Villain however requires it to be printed at an angle, even with the giant drainage hole. To keep the print attached to the build plate, we add support material. These supports have a crucial role in making sure that every point on the model is connected to the build plate to prevent the prints from becoming dislodged.  Printing unsupported portions could damage your printer by puncturing the FEP sheet or damaging the LCD. If you hollow out your model, you’ll also need to consider at which points to add your drainage holes. The holes help relieve the pressure that builds up within the model itself, while also allowing excess resin to come out during the cleaning process. 

    With our files properly set up, we can now begin slicing them into a format that our printer can understand. If you’re using an existing configuration, the correct file format should already be selected. You’ll then be able to save your file onto a USB drive or send it to your printer via Wi-Fi. After that, it’s a simple question of selecting your model and printing it. Before you print your files, you’re going to want to make sure that you don’t have any debris that’s left over in the vat, since these could easily damage your LCD or FEP sheet. Once you’ve finished printing, you can then begin cleaning your print and curing it. It’s much easier to clean the resin print with isopropyl alcohol or an alternative resin cleaner, followed by the removal of the support material. At this stage, you may notice that your prints are still not quite solid, and this is because they require some additional curing. You can either cure them in the sunlight or use a UV curing station for this purpose. Either one will work.  If you want to know more, I have a PDF guide for resin printing that’s available on my website.  This guide includes diagrams and additional information on the whole process to make it easier for newcomers.

    Personal Notes

    Article notes

    • Find and STL, 3MF or OBJ file to print
    • Install + Setup Slicer for Printer
    • Import file
    • Orient + Hollow + Support Model
    • Slice File + Save to USB
    • Print file on Machine

    Recommended Reading

    © Yarkspiri Fantasy Art

    Resin Printer Cover Mod – How to Upgrade SLA Printer Lid


    Instructions

    In today’s article, we’ll be looking at modifying your Resin Printer lid to make it more space efficient.   As always, do this modification at your own risk, and I’m in no way responsible if any damages may occur.

    I, like many others, had pre-ordered the Elegoo Saturn 2, and although I had received it some time ago I was unable to use it because of space restrictions.  In my case, this was caused by the lid design which, although fairly robust, requires several inches to properly remove the cover.  It’s for this reason that I started working on this simple modification for my machine.  To make these changes easier, I’ve reworked the initial design to ensure that the original lid could be reused and that only a limited amount of printing would be required.  This makes it easier for more people to undertake, while also leaving additional room for customization in the future.  Now I will be including the tools, supply list and STL on the main website at YarkspiriFantasyArt.com should you also be interested in doing this yourself.

    Before undertaking this, you’re going to want an easy to clean space, since this will create a lot of debris which will be difficult to clean up latter.  So I’d highly recommend you have a vacuum at the ready since this debris could damage your FEP if it gets into the vat.  You’ll need a rotary tool kit along with a cutting disk that will be large enough to cut through the full thickness of the material. Having a Back saw will help cut all the way through if you don’t have the proper disk thickness, and will also help straighten the cut.

    Before we start cutting, we’re going to place some painter’s tape along the edge of the machine. The cut will be at 2.5 inches from the back of the lid, so you’ll want to cover that area, so you can make your markings.  With the Painter’s tape in place, you’ll then either use a combination square or a simple ruler to draw out your lines.  As mentioned previously, I made it 2.5inches from the back of the machine so that it just barely cleared the linear rail system.  It’s very important that you clear the rail system, which we’ll be attaching the printed portions to this latter.

    Before cutting into the materials, I did some practice runs with a similar plastic to make sure I had the proper speeds for my rotary tool kit.  In my case, I found that a speed of either 3 or 4 was a great balance between speed and control.  Anywhere past the 5 mark and you will risk melting the plastic, which can cause the disk to melt into place.  The cutting disk I was using, was fairly small therefore it didn’t cut all the way through, forcing me to use my Back saw to finish the procedure.  This had the additional benefit of straightening out my cuts, but shouldn’t be necessary if you have the correct supplies.  I began from one side, going all the way around, making sure that I was always facing the backside of the lid.  This helped ensure that I always cut from the same side of the markings.  Once I finished both sides, I then worked on the top of the lid, being very careful not to put too much pressure on it.  While finishing up with the Back saw, I made sure to hold both portions together while I cut through.  

    With the two pieces cut, It was time to deburr the edges and clean the entire area before moving forwards.  This is actually a very important step since material can get stuck in the tape and become difficult to remove later on.  I used a vacuum cleaner to clean the workspace and the lids fully.  Although the lid could fit currently together, it’s better to add a ledge to prevent any light from bleeding through.  Any fully opaque thin plastic will work for this purpose.  I had some material lying around, so I used this, however most art or hardware stores have various materials which could be used for this purpose.  Just make sure whatever you choose will be resistant to isopropyl alcohol and the resin. To attach this material, you’ll have two main options.  You can use a double-sided adhesive or, like me, I used Gaff tape since it doesn’t leave a residue.  If you do decide to use Gaff tape, be aware that you’ll need to replace it every 1 to 2 years.  By putting this tape on both sides of the edge, it allowed for a tighter fit, which in turn prevents the front from coming off as easily.   I did leave about 1 inch clear from the bottom since I was concerned about the tape absorbing resin.   I ended covering that area later on because it allowed too much light through the openings on either side.  What I did do, however, it uses kapton tape to attach the material to that area since it’s more resilient to chemicals.

    After 3d printing these two parts, we’ll superglue this to the top of the Linear rail enclosure.  This will help make sure that the back lid stays in place, since we don’t want this to move around. Using some more Kapton Tape, we’ll tape the bottom edge of the lid to the rest of the machine.  With everything attached, I could finally start testing this new machine.  

    So while this may not be necessary to get a fully functional machine, this mod has made a big difference in my ability to fully utilize my work space. Removing the lid is a lot easier now and has speed up my overall workflow.  I hope you guys enjoyed this video and I hope to see you guys again soon

    Personal Notes

    Supplies + Tools

    • Deburring Tool
    • Rotary Tool
    • Cutting Disks
    • Back Saw
    • Painter’s tape
    • Marker
    • Ruler
    • Combination Square (Optional)

    SLA Printer – What is it? – Pt 01 3D Printing Basics


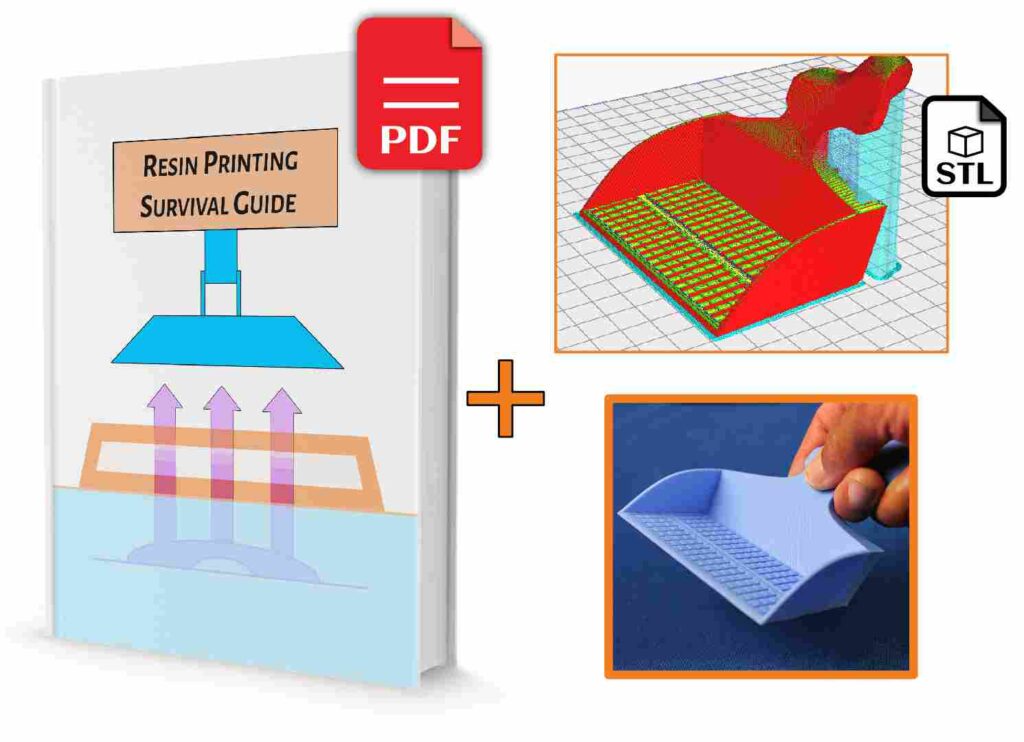
    This guide includes diagrams, FEP sheet replacement instructions, Parts and motherboard explanations, troubleshooting tricks, cleaning, maintenance, settings, firmware + Bonus Resin Scoop and much more.

    What is It?

    Unlike FDM printers, SLA one’s function quite differently depending on the type that you’re using.  In today’s article, well go over the basics of what an SLA printer is and how it works.

    Although there are multiple types of resin printers, today we’ll be focusing on SLA one’s since these are the most common types found in households. These types of printer’s can actually come in 3 different varieties, with the most affordable being the LCD based version. All of these printers use a resin which cures when exposed to a UV light and stores this resin within a container called a vat. The vat itself has a transparent film on the bottom, which allows the resin to be exposed to the light source. DLP, also known as digital light processing, uses a Projector to expose the resin to UV light. LCD or MSLA resin printer’s, use a UV light source in conjunction with an LCD to help cure the resin. Both DLP and LCD printers, cure each layer simultaneously, making them faster when fully utilizing the build plate. Although the term SLA is used as an umbrella term for all of these types, it’s more specifically used to describe stereolithography based printers which use a laser to cure the resin. While these laser printers can potentially produce better levels of details, they can take much longer to complete depending on how much of the build plate is being utilized. Almost all the lower cost resin printers on the market today will be the LCD or MSLA printers, so these will be the ones we’ll be covering today.

    The best way to understand LCD resin printers, is to see them as working similar to screen printing. Each object is made up of several different layers of exposed resin. Each layer is created by shinning a UV light source through the base of the machine, while the LCD masks out any areas which shouldn’t be exposed. This means that it can cure many objects simultaneously without taking additional time. As each layer is cured, the machine will lift before going back down into the next position for the next layer. Originally these printers used RGB screens which were similar to that of a tablet but because of the efficiency, speed and longevity, they have since been replaced with mono screens for the most part. The RGB stands for the Red, Green and Blue filters which create a black mask, while the mono screen uses just the one layer instead. These new screens allow more of the UV light through because it doesn’t need to go through as many filters. RGB screens create coloured images, while the mono one only create a grey scale one.

    The layer thickness, determines the resolution of the print it in the Z axis. The resolution of the X and Y are determined by the screen resolution. Although many machines are described as being 2k or 4k in resolution, a better method of determining the potential of the machine is to calculate the pixels per inch instead. IF you have a 4k screen that’s 8 x 6 inches and boasts a pixel count of 3840×2160, this will actually be a lower resolution than a 5 x 3 inch display with the same pixel density. The reason for this is that you are dividing the pixels to the overall size of the screen. So in order to get a measurement that’s easier to compare, you divide the pixel count by the size instead. Not all companies will readily make this information available, but a quick search on the manufacturer’s website can normally give you the number’s to calculate this.

    Safety is a high priority when dealing with these machines, and that’ll be something we’re going to cover more thoroughly in the next article. When that one’s made available, you will see the link HERE.

    Personal Notes

    Screen Types

    • RGB = Red + Green + Blue = Colour
    • Mono = Black Opaque = Greyscale

    Resolution

    • Pixels per inch
    • Pixel size ÷ size in inches
    Exit mobile version